
Table of Contents
When it comes to desserts, nothing satisfies like a perfectly moist and flavorful cake. But with this White Chocolate Gluten-Free Cake Recipe, you’re in for an indulgent and allergen-friendly twist. Baking gluten-free can feel daunting, and adding white chocolate might seem even more challenging—but don’t worry! This recipe makes it easy.
Whether you’re baking for someone with gluten intolerance or want to try a new spin on a classic dessert, this White Chocolate Gluten-Free Cake Recipe is guaranteed to please. It’s surprisingly simple, and I’ll guide you through every step, share helpful tips, and even answer common questions to ensure your baking success.
Stay tuned, and let’s dive into creating the ultimate gluten-free cake with a dreamy white chocolate touch!
Why White Chocolate and Yellow Cake Are a Perfect Match
Before we dive into the recipe, let’s chat briefly about why this combo works. A classic yellow cake has a buttery, slightly sweet flavor that pairs beautifully with white chocolate’s rich sweetness. The white chocolate doesn’t overpower. It’s like the cherry on top (but way better).
Certainly! Here’s the revised version of your paragraph with more transition words to improve the flow:
Plus, using white chocolate in both the cake batter and the frosting enhances the flavor and gives it that indulgent feel, making it stand out from a regular dessert. In addition, white chocolate’s creamy richness beautifully complements a yellow cake’s buttery texture. If you’re wondering how to achieve all of this in a gluten-free recipe, don’t worry. It’s easier than it is. Furthermore, with the proper techniques and ingredients, you won’t even notice the absence of gluten. Ultimately, the result is a decadent treat that’s perfect for anyone.
What Makes This Recipe Gluten-Free?
The magic of gluten-free baking comes from the flour. Instead of traditional all-purpose flour, we’re using a gluten-free flour blend. Most grocery stores carry great pre-mixed blends, so you don’t need to mix your own unless you want to. Make sure the blend you choose contains xanthan gum or guar gum—they help give the cake that structure and texture you want.
The Perfect Gluten-Free Yellow Cake with White Chocolate Recipe
Here’s what you’ll need to get started:

Ingredients
For the Cake:
- 2 ½ cups gluten-free all-purpose flour with xanthan gum
- 2 teaspoons baking powder
- ½ teaspoon baking soda
- ½ teaspoon salt
- 1 cup unsalted butter (softened)
- 1 ¾ cups granulated sugar
- 4 large eggs
- 1 tablespoon vanilla extract
- 1 cup buttermilk (room temperature)
- ½ cup melted white chocolate (cooled slightly)
For another inspiring treat, try Perfecting Your Kefir Sheet Cake Recipes Card It’s a fantastic recipe for special occasions.
For the White Chocolate Frosting:
- 1 cup unsalted butter (softened)
- 3 cups powdered sugar (sifted)
- ½ cup melted white chocolate (cooled)
- 2-3 tablespoons heavy cream
- 1 teaspoon vanilla extract
- Pinch of salt
Step-by-Step Instructions
- Preheat and Prep
Please preheat the oven to 350°F (175°C) and grease and line two 9-inch round cake pans with parchment paper. Thank you. Gluten-free cakes can stick more than regular ones, so don’t skip this step!
- Mix the Dry Ingredients
Combine the gluten-free flour, baking powder, baking soda, and salt in a medium-sized bowl. Put this mixture aside for now. Next, get the wet ingredients ready.
- Cream Butter and Sugar
In a large mixing bowl, use a hand or stand mixer to cream the softened butter and sugar until light and fluffy. This usually takes about 3-4 minutes. Trust me, this step is worth it, so don’t skimp on the mi. Don’t.
- Add the Eggs and Vanilla
Beat the eggs individually, ensuring each is fully incorporated before adding the next. Stir in the vanilla extract.
- Alternate Dry Ingredients and Buttermilk
With the mixer on low, add the dry ingredients in three parts with the mixer on lows, alternating with the buttermilk. Start and end with the dry ingredients. Mix until combined; don’t overdo it, or the cake will become dense.
- Fold in the White Chocolate
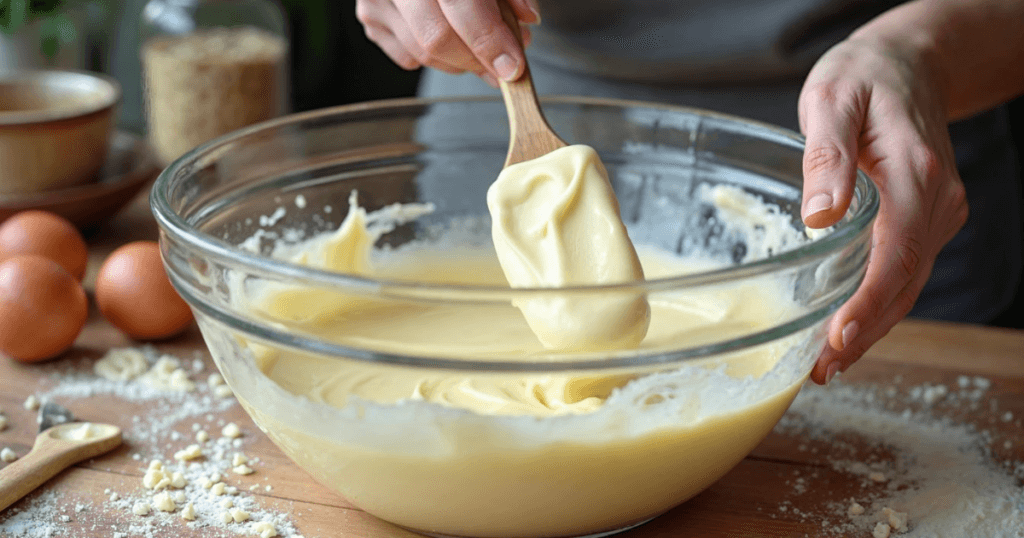
Gently fold the melted and slightly cooled white chocolate using a spatula. This step is where the magic happens. The batter will become extra creamy—it’s pure heaven.
- Bake
Divide the batter evenly between the prepared cake pans. Smooth the tops and bake for 25-30 minutes, or until a toothpick inserted in the center comes out clean. Let the cakes cool in the pans for 10 minutes, then transfer them to a wire rack to cool completely.
Making the Frosting
- Cream the Butter
In a large bowl, beat the softened butter until creamy.
- Add Powdered Sugar
Gradually add the powdered sugar, one cup at a time, mixing on low to avoid a sugar cloud in your kitchen.
- Stir in the White Chocolate
Mix in the melted white chocolate, vanilla extract, and a pinch of salt. Add heavy cream, one tablespoon at a time, until the frosting reaches your desired consistency.
Assembling the Cake
- Place one cake layer on your serving plate and spread a generous amount of frosting.
- Add the second layer and frost the top and sides. Pro tip: First, use a crumb coat (a thin layer of frosting) to catch all the loose crumbs, then chill the cake for 20 minutes before finishing the frosting.
- For a fancy touch, garnish with white chocolate shavings, sprinkles, or fresh fruit.
Tips for Gluten-Free Success
Baking gluten-free can be incredibly rewarding but requires attention to detail and a slightly different approach than traditional baking. Whether preparing a simple vanilla cake or experimenting with white chocolate in a gluten-free yellow cake recipe, the tips below will guide you to success.
Measure Accurately
Accurate measurement is the foundation of gluten-free baking. Unlike regular flour, gluten-free flours behave differently, and even slight variations in quantity can dramatically affect the texture and moisture of your cake.
- Use a Kitchen Scale: Measuring flour by weight instead of volume ensures consistency. A cup of gluten-free flour can vary significantly in weight depending on how it’s scooped or packed.
- Level Your Measuring Cups: Use the spoon-and-level method if you don’t have a scale. Spoon the flour into the measuring cup and level it off with a straight edge. Avoid scooping directly from the bag, as this compacts the flour.
Don’t Overmix
Once you add the flour to your batter, be gentle. Unlike wheat-based batters, gluten-free batters don’t benefit from extended mixing.
- Why It Matters: Overmixing can activate the starches in gluten-free flours too much, leading to a dense or gummy texture.
- How to Avoid It: Use a slow speed on your mixer and stop as soon as the dry ingredients are incorporated. Scrape the sides of the bowl with a spatula to ensure even mixing without overdoing it.
Room Temperature Ingredients
Using room-temperature ingredients is a game changer, especially with gluten-free recipes. It promotes even mixing and better results.
- Butter and Eggs: Cold butter will not cream well; cold eggs can cause the batter to curdle. Set these ingredients out 30 minutes before you start baking.
- Buttermilk or Milk Alternatives: If your recipe calls for buttermilk, let it reach room temperature too. Warmed milk alternatives like almond or coconut milk also work well for white chocolate in a gluten-free yellow cake recipe.
Chill the Frosting
Ensuring consistency is key if you add frosting to your gluten-free cake.
- How to Fix Soft Frosting: If your frosting feels too runny or soft, pop it in the fridge for 10–15 minutes. This will firm up the butter or cream cheese and make it easier to spread or pipe onto your cake.
- Perfect for Layered Cakes: Chilling the frosting also makes it easier to stack and frost layered cakes without worrying about the layers sliding around.
Choose the Right Flour Blend
Not all gluten-free flours are created equal. The success of your cake often depends on the blend you choose.
- Pre-Mixed Blends: For the best texture in gluten-free yellow cakes, choose a blend containing rice flour, potato starch, and xanthan gum.
- Homemade Blends: If you prefer to mix your own, ensure a balance of light starches (like tapioca starch) and heavier flours (like almond flour) to mimic the structure of wheat flour.
Incorporate Flavor Enhancers
Gluten-free cakes can sometimes taste bland. Adding complementary flavors enhances the overall experience.
- Vanilla and White Chocolate: Melt white chocolate in your batter or drizzle it over the finished cake for a luxurious twist. The sweetness pairs beautifully with the subtle flavor of gluten-free yellow cake.
- Citrus Zest: Lemon or orange zest can brighten the flavor, especially in lighter cakes.
Let the Batter Rest
Allowing the batter to rest before baking improves the texture and consistency of your gluten-free cake.
- Why It Works: Resting gives the liquid ingredients time to hydrate the flour, reducing graininess.
- Timing: A 20–30 minute rest is usually sufficient. Meanwhile, preheat your oven and prepare your baking pans.
Test for Doneness
Gluten-free cakes often bake differently than traditional cakes, so keep an eye on them.
- Use the Toothpick Test: Insert a toothpick into the center of the cake. It is done if it comes out clean or with a few moist crumbs.
- Check the Edges: The edges should pull away slightly from the pan when the cake is fully baked.
Store Properly
Gluten-free cakes dry out faster than regular cakes, so proper storage is crucial.
- Wrap Tightly: After the cake has cooled, wrap it in plastic or an airtight container.
- Freeze for Later: Gluten-free cakes freeze well. Slice the cake and freeze individual portions for quick treats.
With these tips, your gluten-free baking adventures will be much more successful, whether crafting a simple treat or decadent white chocolate in a gluten-free yellow cake recipe. Please remember that cultivating patience and honing your skills through practice are essential assets in the culinary arts.
If you’re looking for gluten-free options but prefer plant-based recipes, these are the best ones to try. Easy Kefir Sheet Cake: A Simple Delight for Every Occasion
FAQs on Baking Gluten-Free Cakes and Working with Cake Mixes
Should gluten-free cake batter rest before baking?
Allowing gluten-free cake batter to rest for 20–30 minutes before baking helps hydrate the flour and improve the cake’s texture. This resting period reduces graininess and allows the batter to rise more evenly during baking.
How do you add chocolate to a yellow cake mix?
To add chocolate to a yellow cake mix, you can:
Stir in chocolate chips or chunks for a burst of flavor.
Swirl melted chocolate into the batter for a marbled effect.
Replace part of the liquid in the recipe with melted chocolate or cocoa powder for a richer chocolate flavor.
What goes with white chocolate in a cake?
White chocolate pairs wonderfully with:
Fruits: Raspberries, strawberries, blueberries, or citrus like lemon and orange.
Nuts: Pistachios, almonds, or macadamia nuts.
Flavors: Vanilla, coconut, or caramel for a luxurious combination.
What are the ingredients in the Pillsbury gluten-free yellow cake mix?
The ingredients in Pillsbury Gluten-Free Yellow Cake Mix typically include:
Sugar
Rice flour
Potato starch
Tapioca starch
Baking powder (baking soda, sodium aluminum phosphate, monocalcium phosphate)
Salt
Xanthan gum
Natural flavor: Always check the packaging for the most accurate and up-to-date ingredient list.
Can you overmix a gluten-free cake?
Yes, you can overmix a gluten-free cake. Overmixing can cause the batter to become dense and lead to a rigid or gummy texture. For optimal results, please mix the ingredients until they are thoroughly combined.
Why is my gluten-free cake rubbery?
A rubbery texture in gluten-free cakes is often due to:
Overmixing the batter which develops too much elasticity in the starches.
Too much xanthan gum or other binding agents can make the cake overly dense.
Insufficient fat or liquid leads to a dry and chewy texture. Adjust the recipe by adding more fat (like oil or butter) or liquid to improve softness.
Wrapping It Up
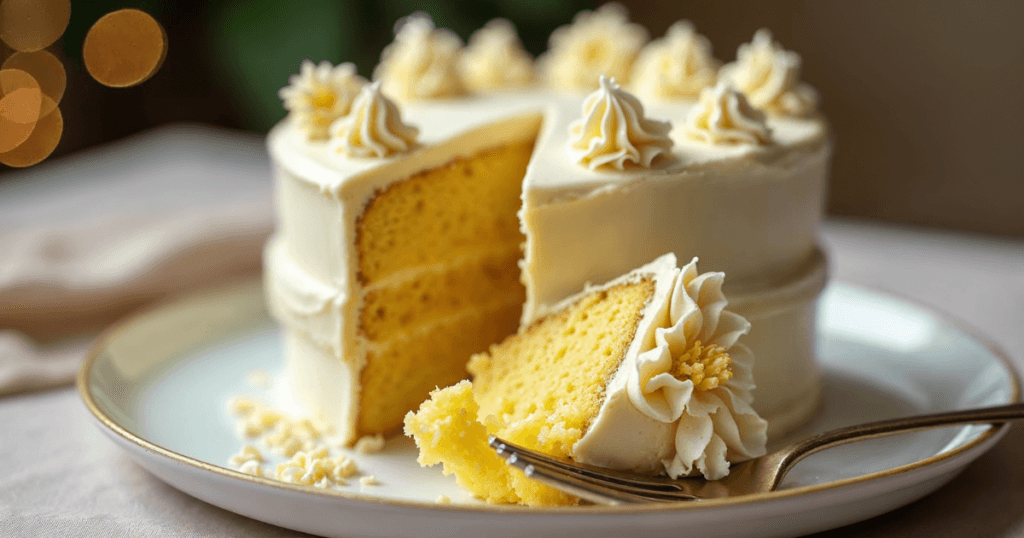
So, there is a gluten-free yellow cake with a white chocolate twist that will be a hit at your next celebration. Whether you’re baking for a birthday, a holiday, or just because it’s Tuesday, this recipe is a crowd-pleaser.
If you’ll excuse me, I’m off to make another batch because the first one disappeared way too fast. Let me know how it turns out for you because nothing excites me more than hearing your success stories! Additionally, if you have any questions or need clarification, please drop them in the comments below. Moreover, sharing your experience helps me improve and inspires others in our baking community. Ultimately, I’m here to ensure your baking journey is as smooth and enjoyable as possible. Happy baking, and don’t forget to savor every bite of your delicious creation!